 Connect - Introduction
Posit Connect is the business-ready version of Shiny Server. It allows publishing all kinds of web documents (shiny apps, Rmarkdown & quarto reports, APIs) easily with granular access controls. Users can publish content either via the one-click integration in Posit, programmatically via the R package {rsconnect} or by importing content from a git repository.
Compared to Shiny server, Connect allows for
- user and role-based access control
- runtime isolation of app requests
- programmatic deployment
- simplified, prettified URLs
- CRON-like scheduled executions
- parameterized reports
- hosting python content (e.g.,
dashapps)
On the admin side, Connect allows to manage its users through industry standard identity providers such as Active Directory/LDAP in centralized fashion.
Additional Features Compared to a Default Connect Installation
Similar to Workbench, cynkra also applies some custom changes to Connect compared to the default installation.
Local Deployment Information
When an app has been deployed, Connect stores information related to this deployment locally in a directory named rsconnect, relative to the directory from which the deployment was initiated.
Each deployment contains an .dcf file which looks as follows
name: $name
title: $title
username: $username
account: $account
server: $server
hostUrl: $hostUrl
appId: $appId
bundleId: $bundleId
url: $url
when: $when
lastSyncTime: $lastSyncTime
isQuarto: $isQuarto
asMultiple: $asMultiple
asStatic: $asStatic
This information is reused for subsequent deployments to infer whether an app is going to be updated and which revision (indicated by bundleId) is the most recent one.
Defining Resource Requests of an App
For dynamic deployments (e.g., shiny apps), users can set runtime settings. These determine how an app behaves when a user requests its content. While the official Connect user guide also explains these, it is not always fully clear which practical implications come with changing these values.
| Value | Description |
|---|---|
Max processes |
This number determines how many unique requests (i.e., people) the app can serve at the same time. Each unique request gets assigned one app process. The default is set to three and should be increased if the app is assumed to get a lot of individual requests. |
Min processes |
The minimum number of processes which are always active. If this is set to >= 1, n process(es) serving the app will always be ready for incoming requests. This is most useful for apps which take some time to load. The downside is that a certain amount of app processes will always be running and by that consuming/blocking resources on the host its running on. |
Max connections per process |
Each unique request can open multiple instances of an app. Doing so will count towards the “connections” count of the processes and not against the “processes” count. |
Load factor |
Logic describing whether (and how lazy) additional processes are spawned for incoming requests. Affected by Max processes and Max connections per process. Often this setting should not be changed from its default of 0.5. |
Preview Image
When an app gets a public URL, one can set a preview image under the “Info” tab which will be used when the URL gets linked in specific formats (e.g., gallery style embeds in websites).
Parameterized Reports
Connect is capable of handling parameterized reports, i.e., .Rmd or .qmd files which operate with variables. These variables can be set and changed within Connect to potentially create new outputs from the same document without creating a new deployment.
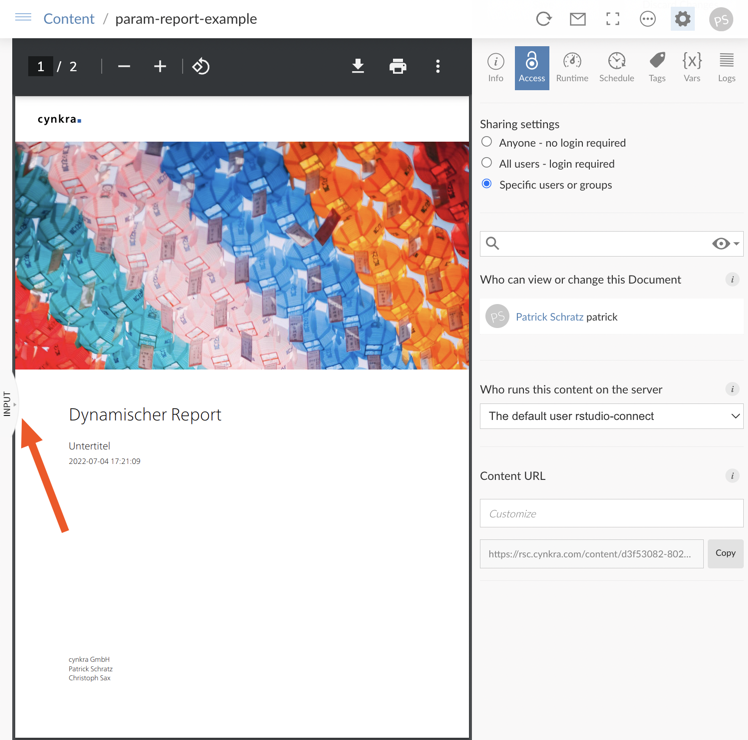
The input field for the parameters is somewhat tricky to spot - it is on the left side of the web page and collapsed by default:

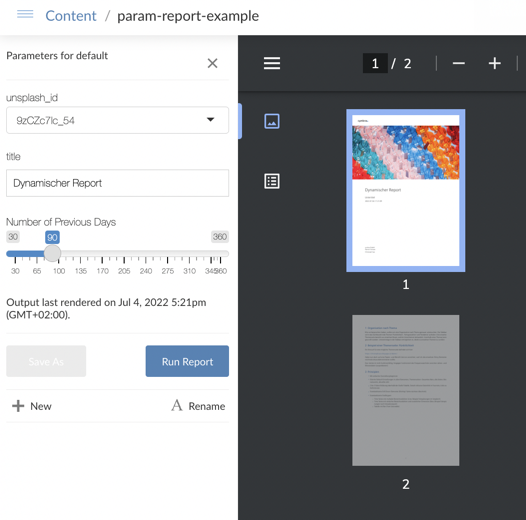
When expanding the “Input” column, you can see fields for changing the parameters. After changing parameters and clicking on “Run report,” the Rmd document will be rendered again with the new inputs.
